
Claim: You can only benefit from learning to use vinyl (and sticker paper) more efficiently.
Reasons:
- If you are a student operating a business, you want to make sure your finances stretch as far as they can. Getting more out of your materials is one way to do that.
- If you are a person interested in recycling and sustainability, using material efficiently aligns with your interest.
- Using material efficiently will save you time in the long run.
Convinced yet? I hope so! Here are some things you should know when it comes to using vinyl more efficiently:
Know the dimensions you’re working with.
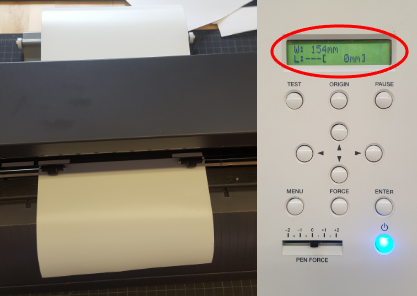
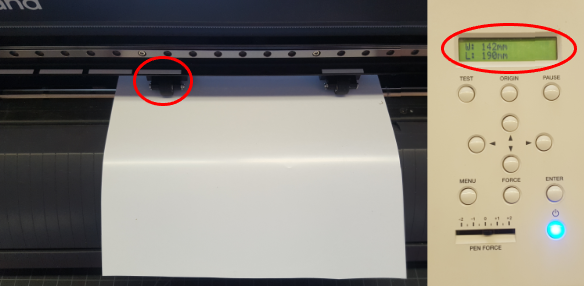
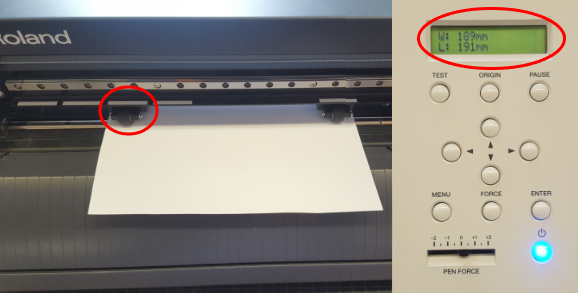
When you position and secure vinyl in the vinyl cutter, you have an opportunity to find out the dimensions of the cutting area for the vinyl you use.
On the vinyl cutter, select “Piece” if you plan to cut a loose piece of vinyl, and select “Edge” if you plan to cut from a roll of vinyl. The vinyl cutter will then tell you either the width of the cutting area for the roll of vinyl or the width and length (or height) of the cutting area of a piece of vinyl.
Take a look at the photos below to better understand this point.
Arrange your designs efficiently.
Once you know how much space you have to cut on your vinyl, you can change the size of your artboard in Adobe Illustrator and optimize your cutting space.
Changing artboard size in Adobe Illustrator
When you open a new file in Adobe Illustrator, the software will ask you to select the dimensions of your work space, or artboard. (A general starting artboard size is the same as a sheet of paper, 8.5 inches by 11 inches.) No matter what you select as your starting artboard size, you can change it to suit your needs. The artboard tool is highlighted in the image below.

When you want to change the artboard size, select the artboard tool, then use the artboard menu (pictured below) to change the width and height of the artboard. When you’re done, click on the selection tool (in the top left of the above image) to revert to the mouse icon.

The vinyl cutter will tell you the width and height of the cutting area in millimeters (mm). You can type the dimensions from the vinyl cutter directly into the artboard menu, and Adobe Illustrator will convert it into the units of the document. Just remember to type in the units as well!
Optimizing cutting space by minimizing wasted space
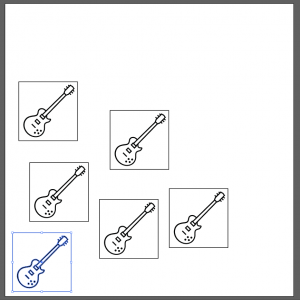
In Adobe Illustrator, you want to make sure that the designs you want to cut are as efficiently arranged as possible. For example, let’s say I want to cut out a guitar in vinyl.
The first thing to do is change the artboard size to match the size of my cutting area.
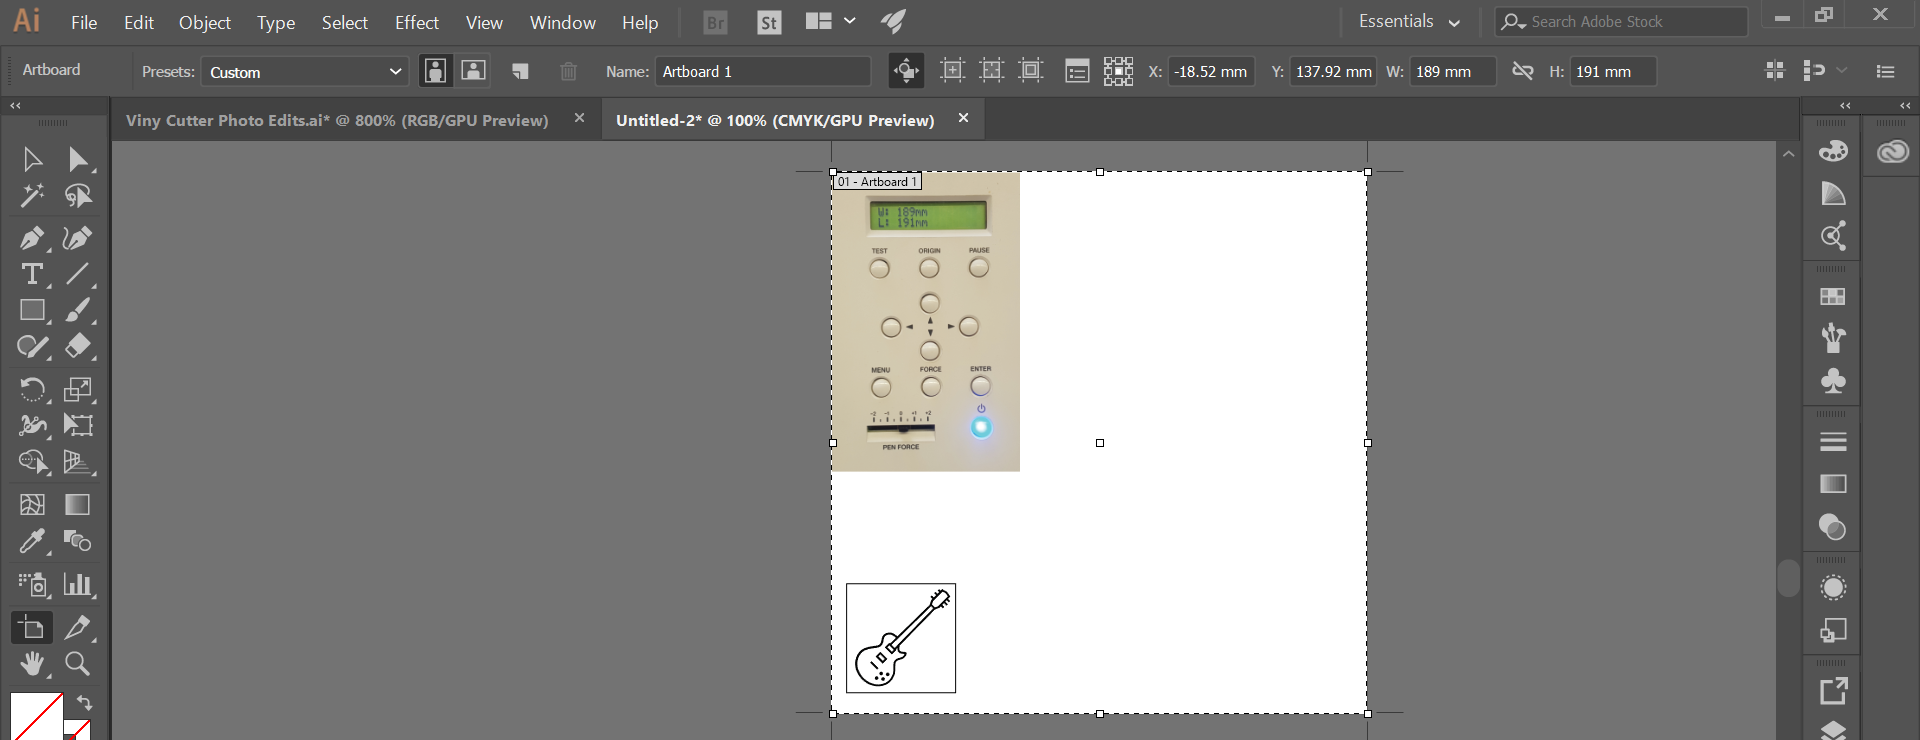
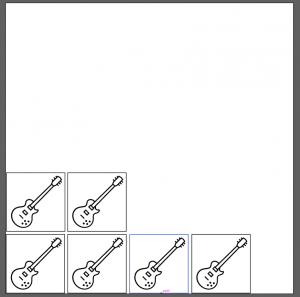
Then, the major key to optimizing space this way is that you want to use as much horizontal space as possible.
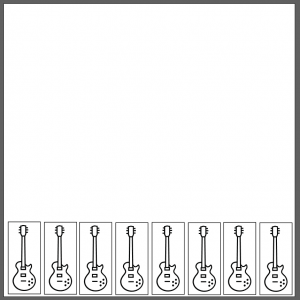
Optimizing cutting space by changing the vinyl cutter origin
Another option for optimizing cutting space is actually through the vinyl cutter itself. If you want to cut a lot of the same design(s) on the same piece of vinyl, you can change where the vinyl cutter will start cutting.
After discovering the cutting area dimensions, or after having performed one cut with vinyl cutter, you can use the arrow buttons on the vinyl cutter to re-position the head of the vinyl cutter.
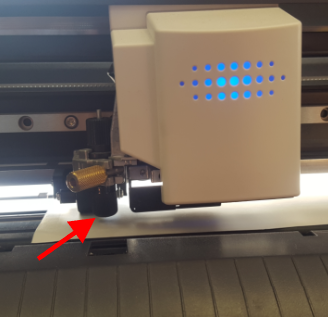
Once you have moved the head of the cutter to your desired location, hold the Origin button for a few seconds until the display says “Origin Set.” Cut your design and repeat this process as necessary.
Check the vinyl cutter’s pressure settings.
One of the easiest ways to avoid wasting vinyl is to make sure the pressure settings are suitable for your material.
After discovering the cutting area dimensions, you can perform a test cut at different cut pressure settings to see what will work for you. Here’s how:
- Select the desired pressure setting using the pen force slider.
- Hold down the Test button for a few seconds. The vinyl cutter display will read “Test Cutting.”
- Once the cutter is done, check the design. It should look something like this:
![]()
You will know if you’ve chosen the correct pressure setting if you can easily peel away each shape, from the outside inward, without the next shape also peeling.
- If the pen force is too high, the blade will cut entirely through the vinyl, which is not good.
- If the pen force is too low, you won’t be able to peel anything away at all. Also not good.
If everything looks good, you’re set to go!
In conclusion
- You can save time and money by using materials more efficiently. (And it’s good for the planet, too!)
- Make sure you know the dimensions of your vinyl and, more importantly, the cutting area you have to work with.
- Make sure your designs are arranged to optimize the cutting area you have. You can do this in Adobe Illustrator and/or on the vinyl cutter itself.
- Double-check to determine if you’re using a pressure setting that works for your material.
Do these things, and you will be a lean, mean, vinyl cutting machine!
Comments