
Is your key ring looking a little bland? Lacking personality? You’ve come to the right place! This tutorial will help you use a laser cutter to design your own keychain to impress all your friends.
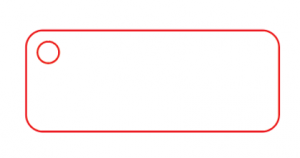
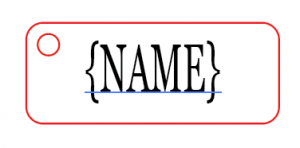
Step 1: You will need to design a basic keychain on Adobe Illustrator. Make sure to add a keyring hole! (see example below). Step 2: If you want to customize your design in Adobe Illustrator with your name, or some other design, you can do that now. (see below)
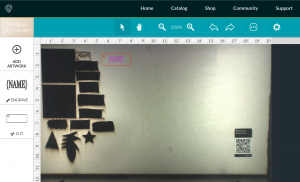
Step 3: Now you have your keychain design ready to go! Save it as a .svg file, and head over to the glowforge site: app.glowforge.com Step 4: Turn on the Glowforge (power switch is on the back). Step 5: Choose the material you want to use and place it inside the Glowforge. (We recommend using Proofgrade materials) Step 6: On the Glowforge app, you will see a button in the top left corner that says “Upload.” Press that button and look for the .svg file you just created! Step 7: Now you can easily drag and drop your design to the place you want to cut. (See below) Step 8: Select whether you want to “Cut” or “Engrave” different sections. For this keychain I have selected to “cut” the outline/keyring hole, and “engrave” the text. Since I am using Proofgrade materials, the Glowforge automatically knows what settings to use! (See above)
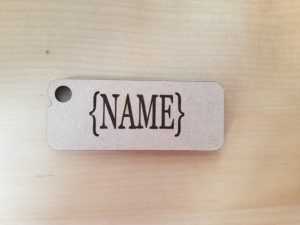
Step 9: You’re ready to cut! Press the “print button in the top right corner.” Step 10: Once the Glowforge is ready to cut, the blue print button on the machine will start flashing. Press that button and let the cutting begin! Once the Glowforge is done cutting you can open the lid and take out that sweet new keychain! Nice work.
1 Comment
Helpful Tip: For keychains, the diameter of the hole should be between 1/8” and 1/4”.
2